Microsoft Entra ID / Azure AD Identity Provider
This guide covers connecting your Azure Active Directory to Operandio. You must have the appropriate permission level for your user account to complete these steps. If you are using the Operandio build-in permission levels, this must be Full Administrator.
Preparing your Operandio account
The first step is to create an Identity Provider registration within your Operandio settings.
- Log in to Operandio
- Head to Settings > Single Sign-On and click the Add identity provider button

- Give your new Identity Provider a name, and enter TBC for both Client ID and Authority, we will come back and fill these in with details we get from the Azure AD app registration

- Click the Save identity provider button
- The new identity provider will appear in the Single Sign-On screen. Note the Browser logout link, Browser redirect URI and Device redirect URI highlighted below. We will use on the Azure side in the next steps.

Creating the Azure AD App Registration
Now we need to register Operandio with your Azure Active Directory.
- Log in to your Azure account, and head to your Azure AD area
- Head to the App registrations section (should be under the Manage left hand menu)
- Enter a Name, for example Operandio, noting this will be displayed to users as they authenticate
- Select an option for Supported account types based on how you will manage who has access to Operandio
- Leave Redirect URI blank for now, we will configure these later
- Click the Register button to complete creating the app registration, you should now land at the app registrations Overview screen
Configuring browser & mobile platforms
Next up we will add platform details for both the Operandio browser based client and also the Operandio mobile/tablet application (personal device mode).
Browser client configuration
- From the Azure AD app registration we landed at above, head to Manage > Authentication

- Click the Add a platform button, then select Single-page application

- Retrieve the Browser redirect URI we noted for the identity provider you registered back in Operandio settings, and put it in to the Redirect URIs field
- Similarly, retrieve the Browser logout link from earlier and put it in the Front-channel logout URL field provided
- Under Implicit grant and hybrid flows, tick the box for ID tokens
- Click the Configure button to continue

Mobile/tablet app client configuration (personal device mode)
- In Manager > Authentication, click the Add a platform button again like we did above for the browser client configuration, but this time select the Mobile and desktop applications option

- Retrieve the Device redirect URI we noted for the identity provider you registered back in Operandio settings and put it in the Custom redirect URIs field provided
- Click the Configure button to continue

Finalising the configuration in Operandio
Everything is now ready on the Azure AD side, we need to fill a few details back from Azure to the identity provider registration in Operandio, the details we entered as TBC.
- In your Azure AD app registration, head back to the Overview screen
- Copy the Application (client) ID, then put this in your Operandio identity provider Client ID field, replacing the TBC we entered there at creation
-
Copy the Directory (tenant) ID, then then build a link using this format with it, and place this in the Operandio identity provider Authority field, replacing the TBC we entered there at creation
https://login.microsoftonline.com/{ Your Directory (tenant) ID }/v2.0/
For example, if your Directory (tenant) ID is: bd770d9c-62a3-4232-8e82-d3cd44bfa280
Your Authority link would be:
https://login.microsoftonline.com/bd770d9c-62a3-4232-8e82-d3cd44bfa280/v2.0/
- Once these details are in, Save your Operandio identity provider

Everything is now ready to go!
Accessing Operandio using your new Azure AD Identity Provider
Now everything is configured, you can test logging in. User profiles will be created just-in-time (JIT) as they log in for the first time. See the Advanced options section in your identity provider if you would like all JIT users to be assigned a specific permission level, they will otherwise be assigned the default Operandio basic Employee permission level.
Alternatively you can pre-provision access through the Operandio > People area, selecting the Single sign-on user option. The benefit of pre-provisioning is you can set up all their relevant access ahead of their first login.
IMPORTANT: When pre-provisioning users for your Azure AD Identity Provider, you must ensure you set the User ID field to the users Azure ObjectID.
The Azure ObjectID is a GUID (Globally Unique Identifier) you can obtain through your Azure Microsoft Entra ID > Manage > Users area for individual users. This is also included as the id column when you bulk export the user list to a CSV from this users area.
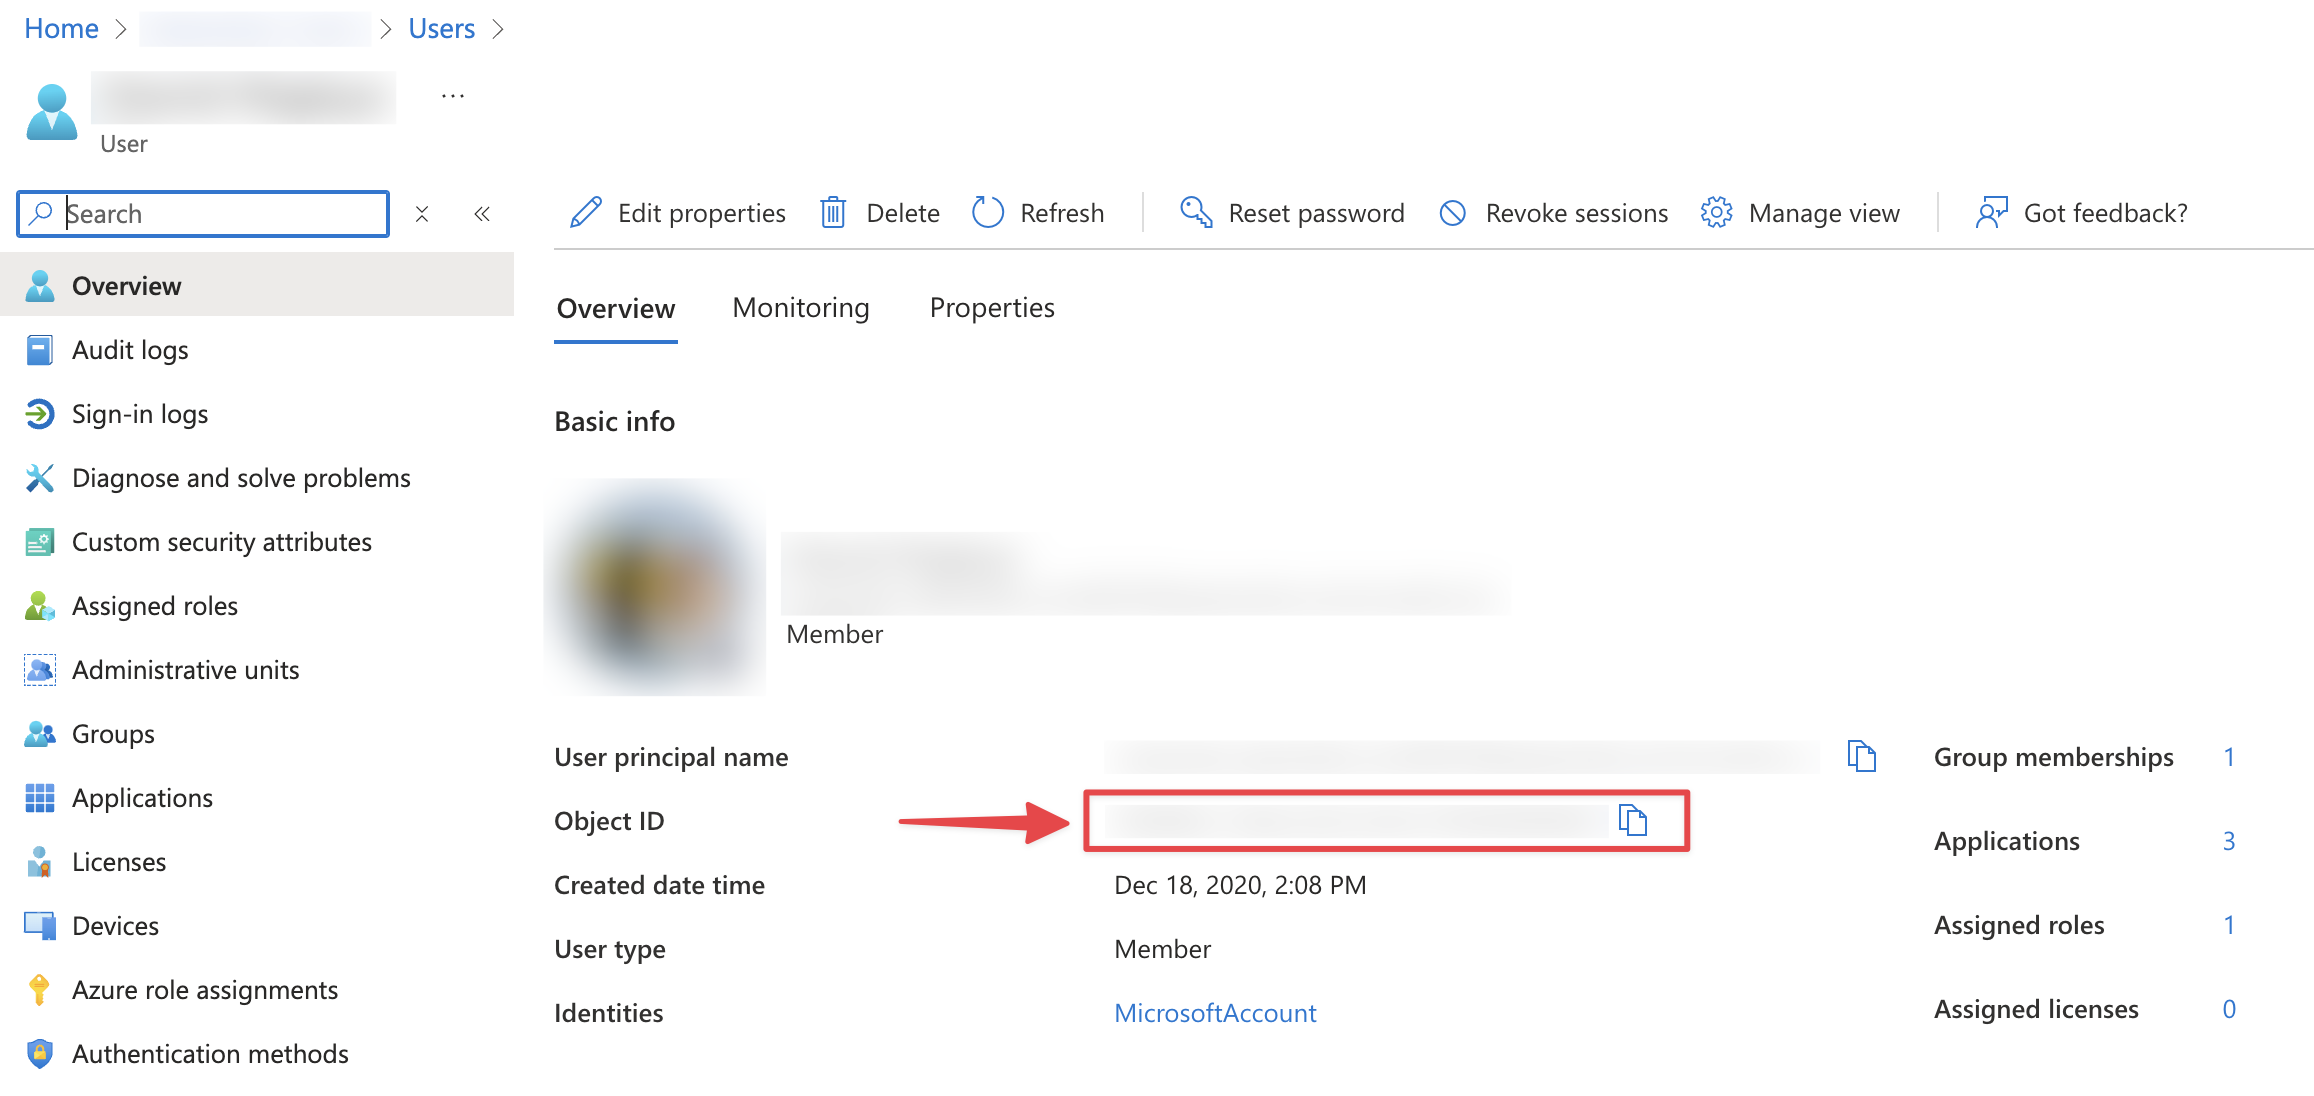
It will look something like this 8a726c59-0b68-4cbb-895c-f8fab5a51e6e and must be entered into the Single sign-on user form per below.

Login Links
Two links are provided depending on how the application is being accessed. QR codes are also provided for both for easy access from a device with QR support.
Browser login link - Users can log in to Operandio using this unique link as shown below, in a web browser. This is ideal to distribute to users as you see fit to provide access across your organisation. The Operandio login screen will also remember this identity provider and provide a button to users that have accessed it previously, in case they head to the login without the unique link.
Device login link - Similarly users can log in to the Operandio mobile/tablet application with a unique link, also accessible using QR code. Users need to download and install the Operandio mobile app from their device app store prior, then scan the QR code to initiate the login process.
