How to install & connect a Browan / Gemtek Femto Gateway via Wifi
Last updated: August 24, 2026
Gateway Overview
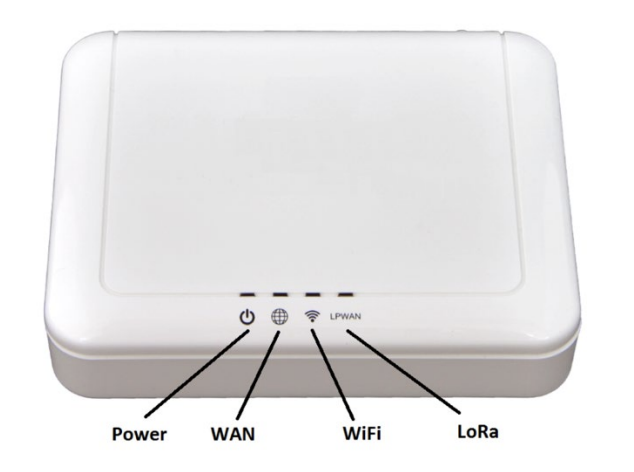
IoT Femto Gateway – LED Indicators
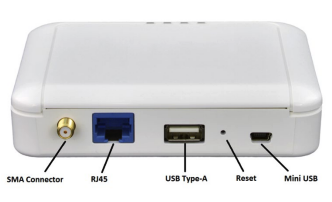
IoT Femto Gateway – I/O Ports
IMPORTANT: While the Femto gateway supports both Wi-Fi and Ethernet connections, we strongly recommend using Ethernet if you have an available data point. Ethernet is generally more reliable and offers a simple plug-and-play setup—just plug it in, and you’re connected.
Click here to read the Ethernet connection guide
1. Placing the Gateway in your venue
The first thing you need to do is identify where in your facility you will be installing the your ethernet/wifi gateway.
The gateway should ideally be installed within 300 meters / 328 yards of all the sensors that will be connected to it.
The ethernet/wifi gateway needs an available power outlet and ethernet data point (if you are connecting via ethernet as opposed to wifi. If you're connecting via wifi, skip to point 6 below.)
2. Connecting your Gateway via Wifi
Before starting the setup, you will need a laptop or desktop that is connected to the same Wifi network on hand.
Next, you need to do is identify where in your facility you will be installing the your ethernet/wifi gateway.
The gateway should ideally be installed within 300 meters / 328 yards of all the sensors that will be connected to it.
Attach the antenna that comes inside the box to the gateway.
Plug in the gateway to the power source and turn it on.
Newer models
On your Wifi connected laptop or desktop computer, manually add a new Wifi connection. Enter the SSID found on the underside of the gateway called "AP-XXXXXX" e.g. "AP-BBDB29" (this is just an example), use Wifi setting with security = WPA/WPA2 (not WPA2/WPA3) to connect.
Older models
On your Wifi connected laptop or desktop computer, look for a Wifi network that will become available called "AP-XXXXXX" e.g. "AP-BBDB29" (this is just an example), use Wifi setting with security = none to connect.
3. Accessing the admin portal
Once connected, open the following address in your web browser: https://192.168.55.1 (newer models) http://192.168.55.1/ (older models), then once loaded, login with username: "admin" password: as written on the underside label of the gateway
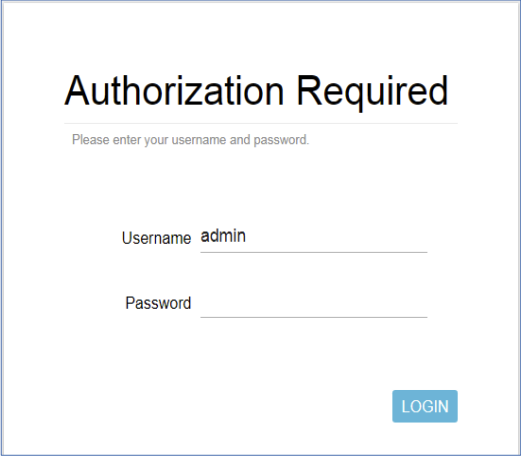
Web browser login screen
Once logged in, you now need to configure "Wireless Extender Mode" which will connect the gateway to your Wifi network.
Click on "Wireless Extender" and then press the SCAN button:
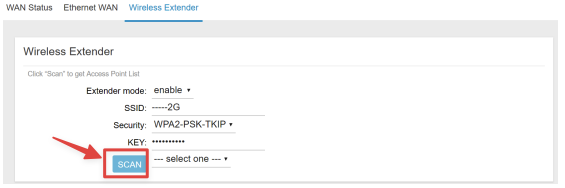
Wireless Extender screen
After the scan you should see your Wifi network. Click on that and enter in your Wifi network details (username and password.)
This will connect your Gateway to your Wifi network, once this is done you can close the web interface.
Now that your Wifi Gateway is connected, you can now install your temperature/humidity sensors following this guide.